Step 8 - Creating the Interior Walls
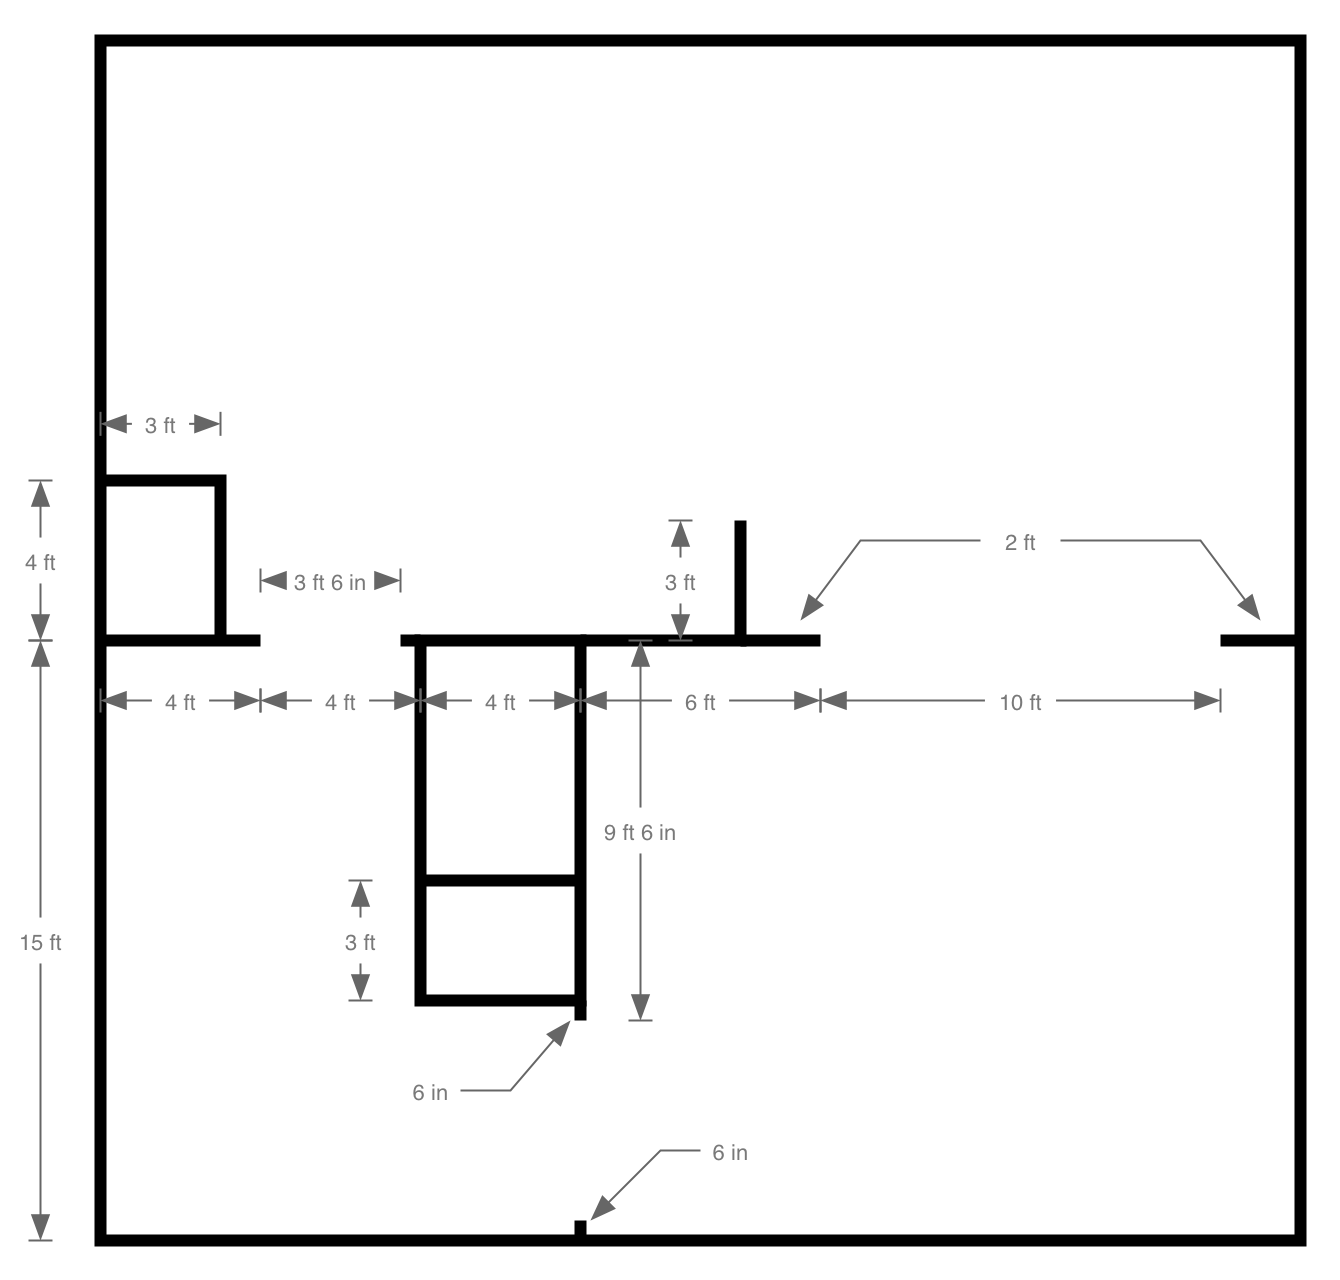
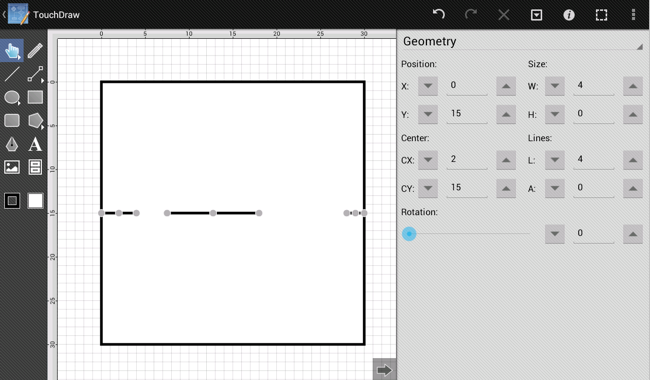
The next step is to create the interior walls for the drawing. We created the following diagram to provide a guide as to where the walls should be placed (also done as an additional layer within the TouchDraw drawing):
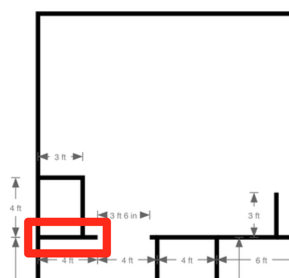
Start by drawing the the wall highlighted below.
First, as with the exterior walls, the interior walls should be drawn with a line thickness of 6. TouchDraw will remember that the last used stroke size was 6; however, it is good to know that the attributes (stroke, fill, text, etc…) for a shape can be set before creating it. In this case, had the stroke thickness been changed in the meantime, the stroke thickness could be set for all new lines drawn by opening the Stroke Panel and setting the Stroke Size as done previously.
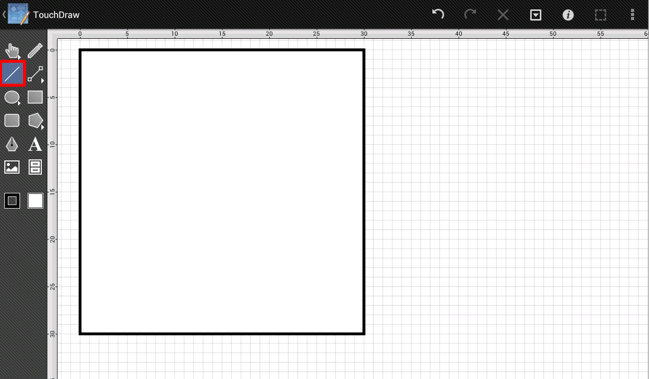
Second, the Line Tool will need to be used to create the interior walls, as shown by the highlighted item in the screenshot below.
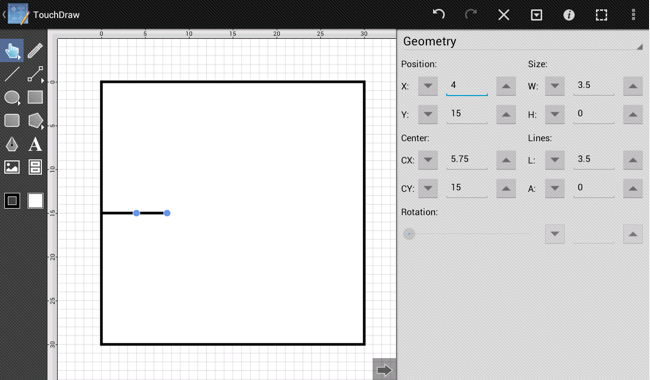
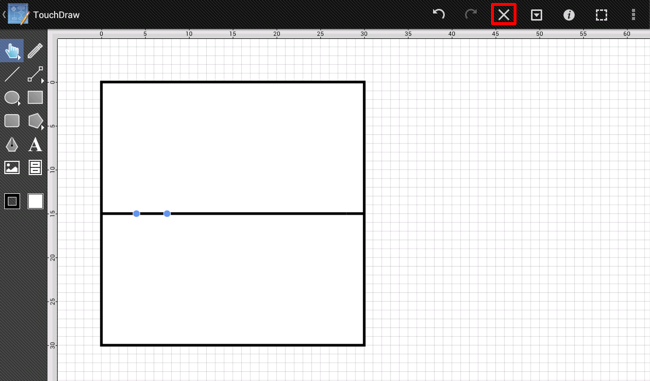
From the dimensions shown above, we know that the first interior wall is 15 ft down from the top left of the drawing (and also 15 ft up from the bottom left) and 4 ft long. As with drawing a rectangle, touch and drag to create a line.
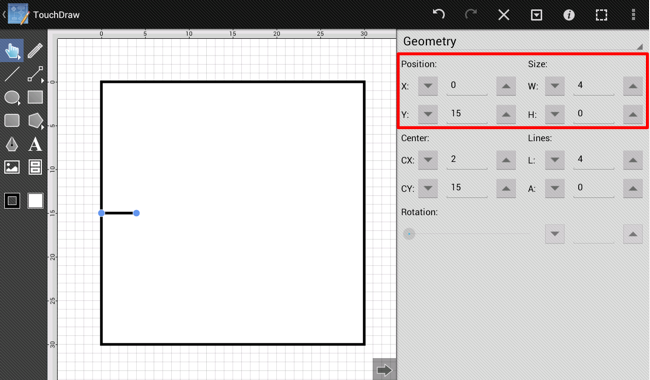
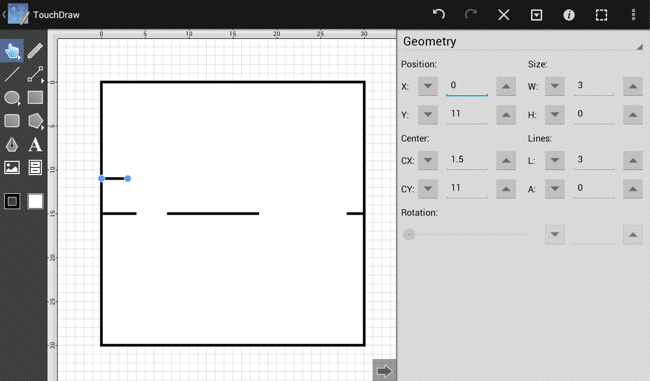
The angle, length, start points, and end points of the line can be edited after it has been drawn. As before, either drag the blue handles or use the Geometry Panel (as shown above) to edit the location of the line.
Next, we know from the dimensions above that there is a 3 ft 6 in open doorway to the right of that wall. We will draw a temporary line in that space to use as a point of reference for other walls to be drawn later.
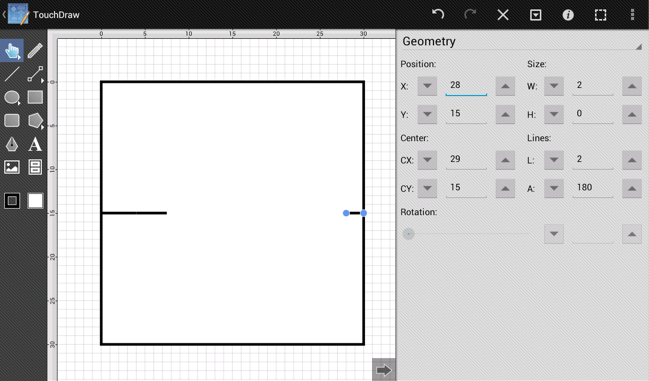
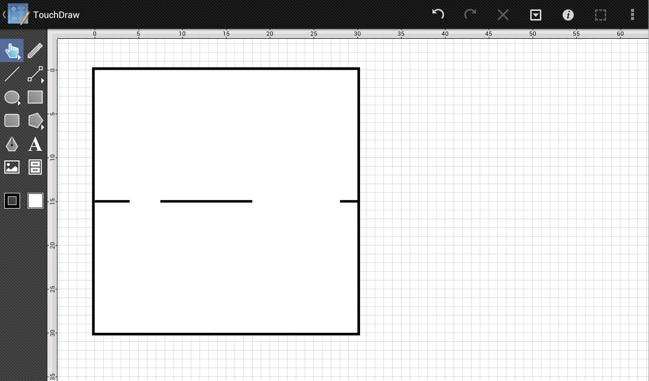
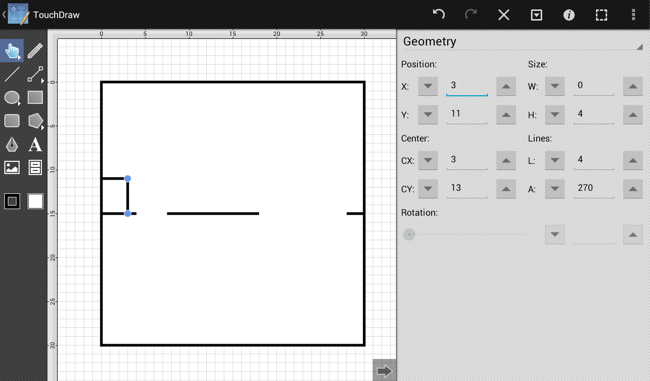
Move to the opposite side of the house and draw the 2 ft wall there.
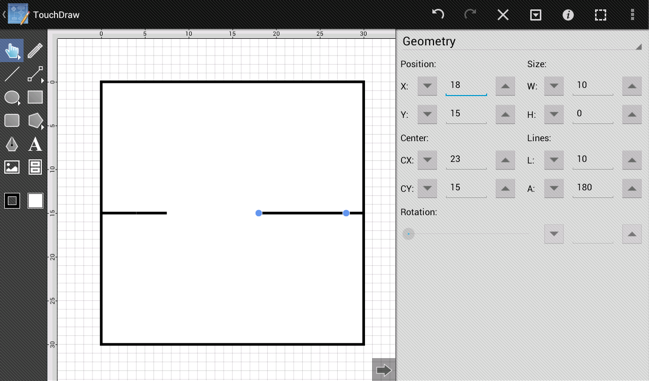
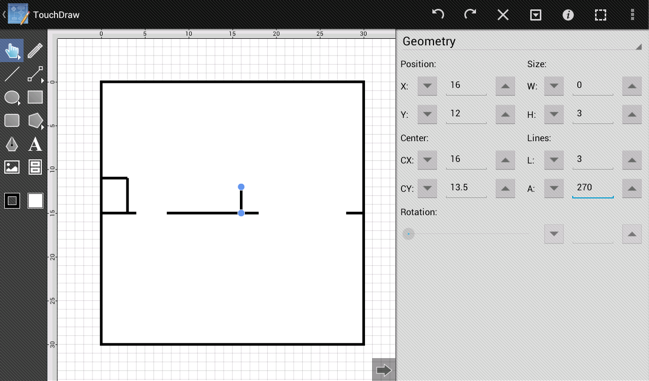
Next, as above, draw another temporary line for the 10 ft opening to the left of that wall.
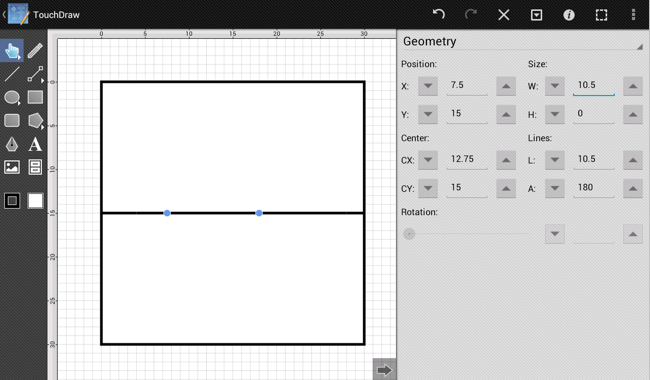
Draw the wall that fills the empty space between the two temporary lines.
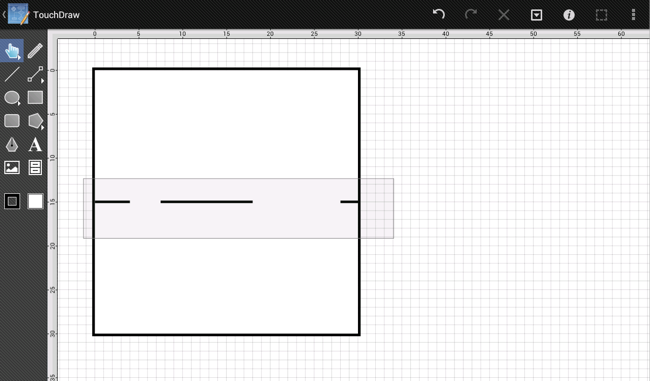
Next, delete the two temporary lines since they are no longer needed. To do this, first tap on one of the lines to select it, and then press on the Delete Button (the X) in the Top Toolbar to delete the lines from the drawing.
After both temporary segments have been deleted, the drawing should look like the following screenshot example:
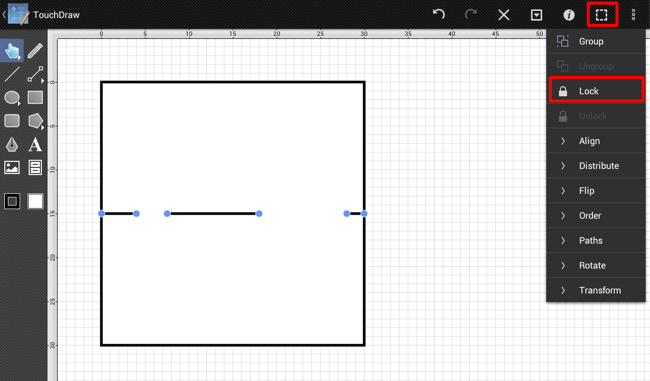
As a matter of good practice, the created walls should now be selected and locked. They can be locked all at once rather than going through the trouble of locking them one by one. With the Selection Tool enabled (the one that looks like a pointing finger), perform a Touch/Drag gesture combination to draw a rectangle around all of the shapes and select them.
Once all shapes have been selected, open the Selection Menu by pressing on the Selection Button in the Top Toolbar and then tap on the Lockoption to lock the figures, as shown below.
The drawing will appear as shown in the screenshot below once the figures have been locked.
Next, draw the walls for the Kitchen Closet.
Either use the grid and the ruler as points of reference or draw temporary reference lines to get the proper offset.
Draw the wall to the right of the refrigerator.
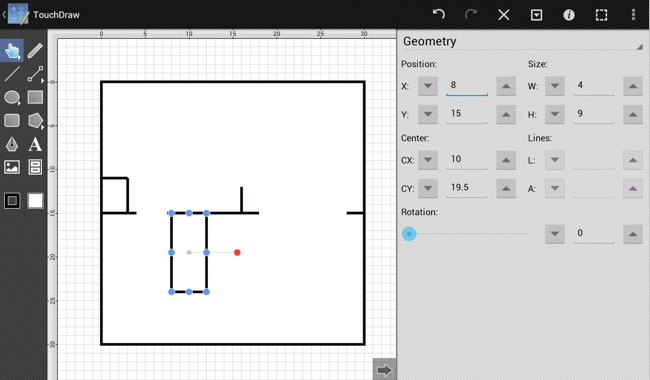
Use the Rectangle Tool to draw the outline of the front closet and the half bath. (Note, by looking at the dimensions above, we can figure out that this rectangle should be 4ft x 9 ft)
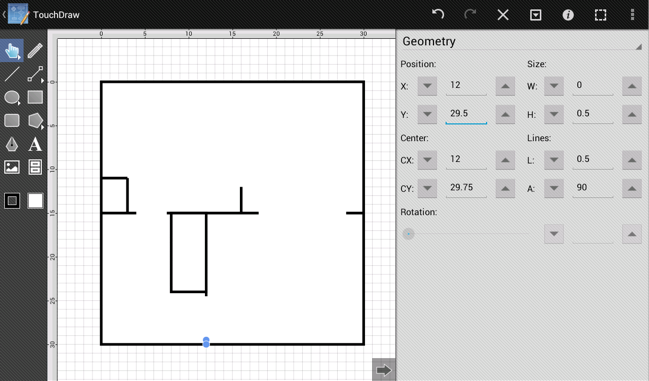
Next, draw the two 6 in walls between the foyer and the living room.
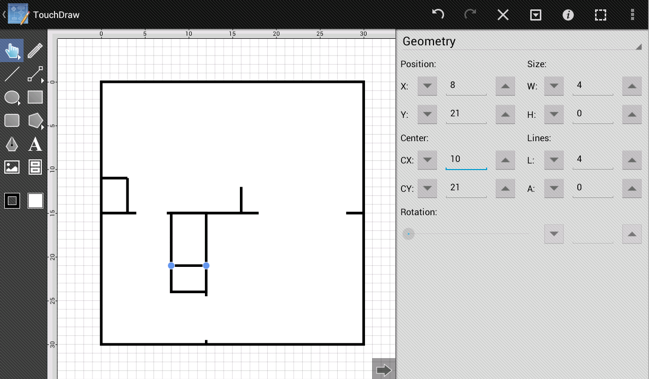
Lastly, create the wall between the front closet and the half bath.
Now all of the lines representing the interior walls have been created.